 Tweet
Tweet
Ever had a Highlift Jack get stuck? Often times it is related to poor maintenance of your jack.
Essentially, the pins and moving parts need lubrication a couple of times a year.
Mine hasn’t been apart in almost 10 years. In other words, I have never maintained it. :-/
This summer, I am out in California, on a trail with rocks the size of coffee tables, refrigerators and small cars when I get high centered. I grabbed my jack, jacked my Jeep up and then…………. then the jack got stuck.
So……… I am going to disassemble my jack and make sure that its properly maintained.
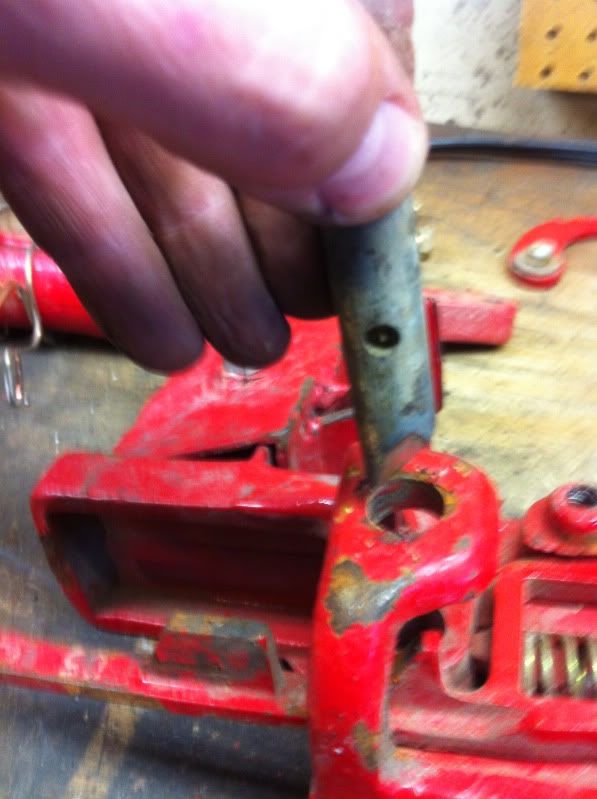
1. I took the clevis bolt out and took the clevis off the end.
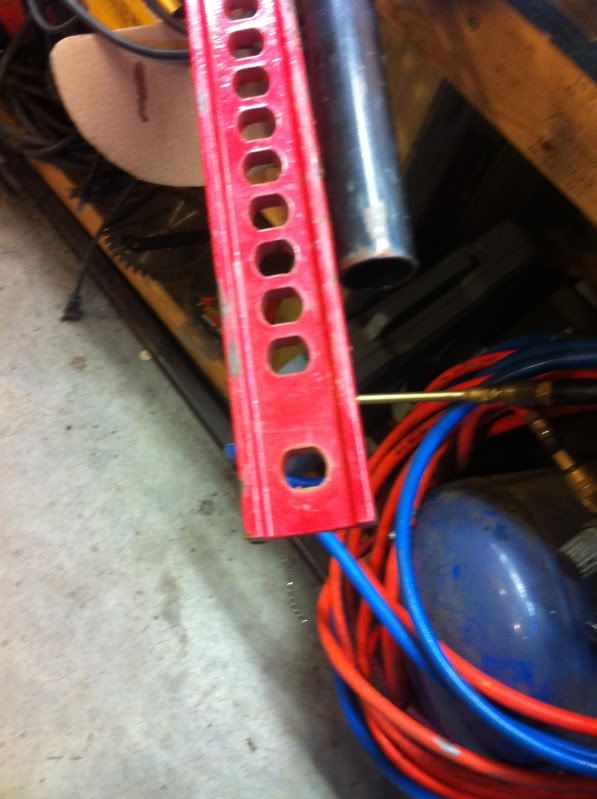
This allows you too slide the "large runner" assembly out.
Step 2
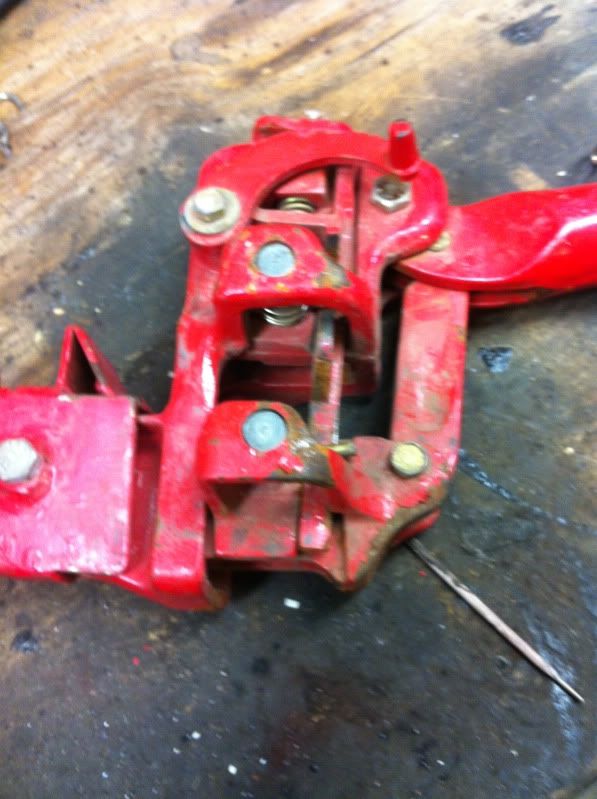
Step 3 Take the bolts out of the pitman arm.
Requires a 1/2 and 13/16" sockets
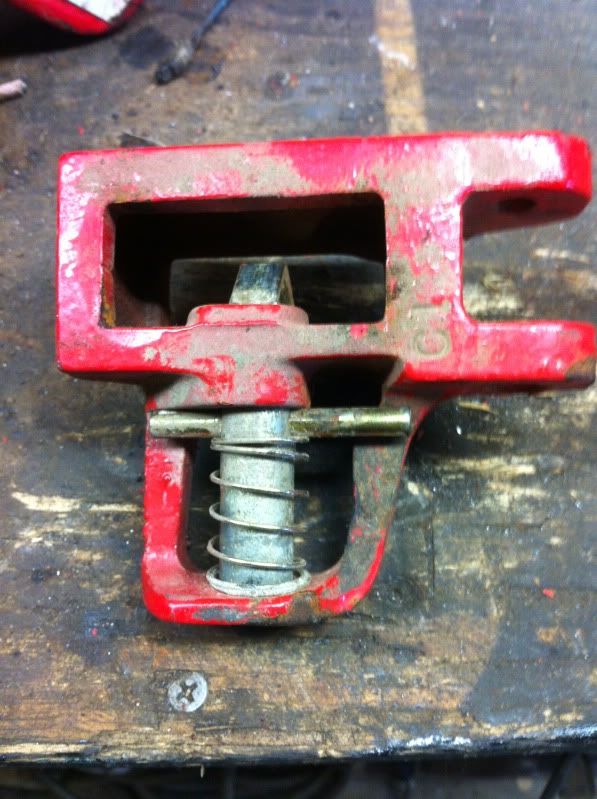
Step 4 Pull the small runner out, which is the lower runner, and fits inside the larger runner.
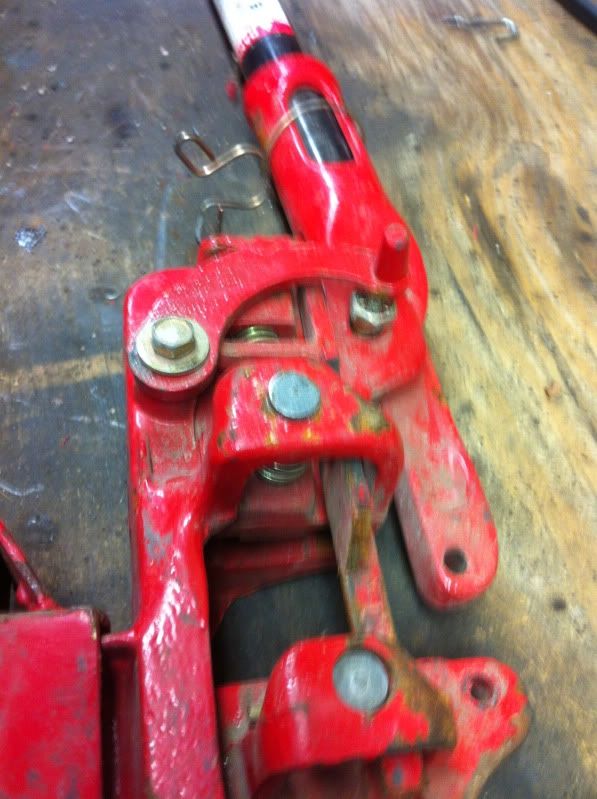
Step 5 Knock the pin out of the upper or top climbing pin.
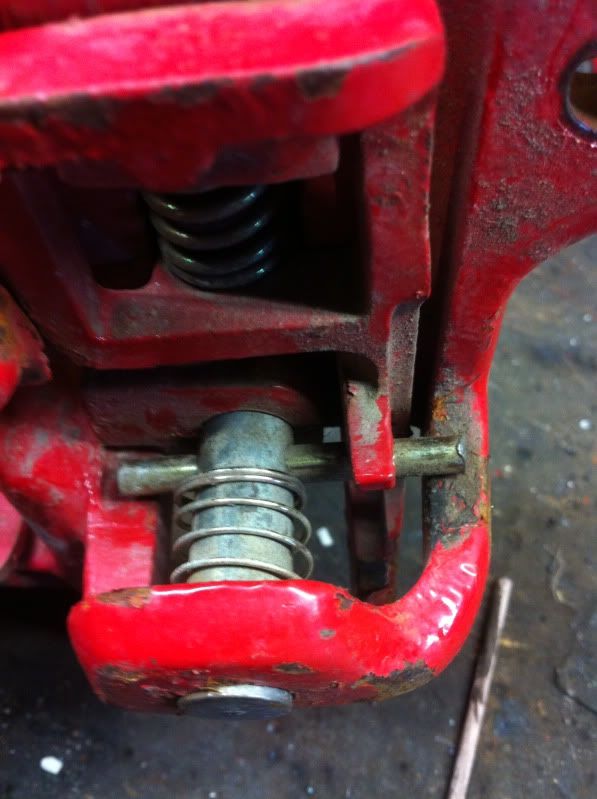
Pay attention on what direction the wedge is pointed before pulling it out of the upper runner.
Both climbing pins should have the wedge pointed towards the top of the High Lift Jack.
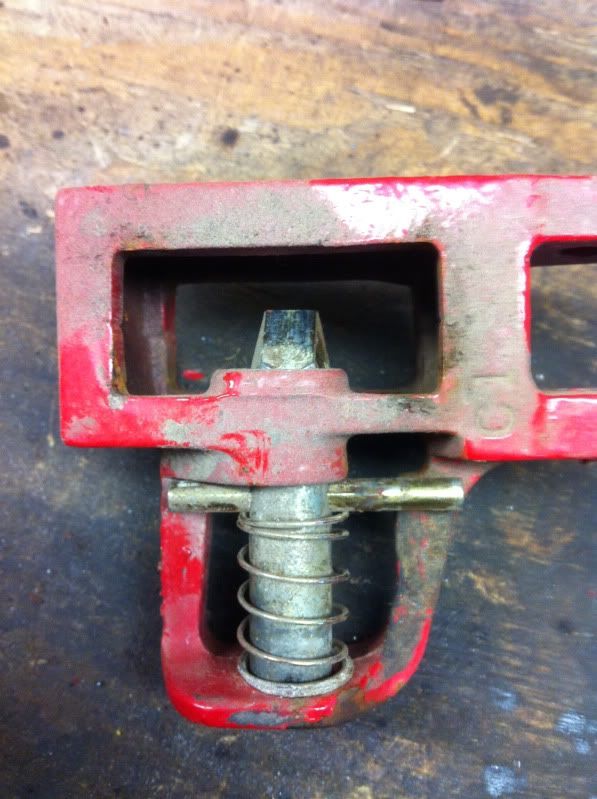
Step 6 Knock the pin out of the lower runner
Step 7 Lube it up
Step 8 Put it back togather.
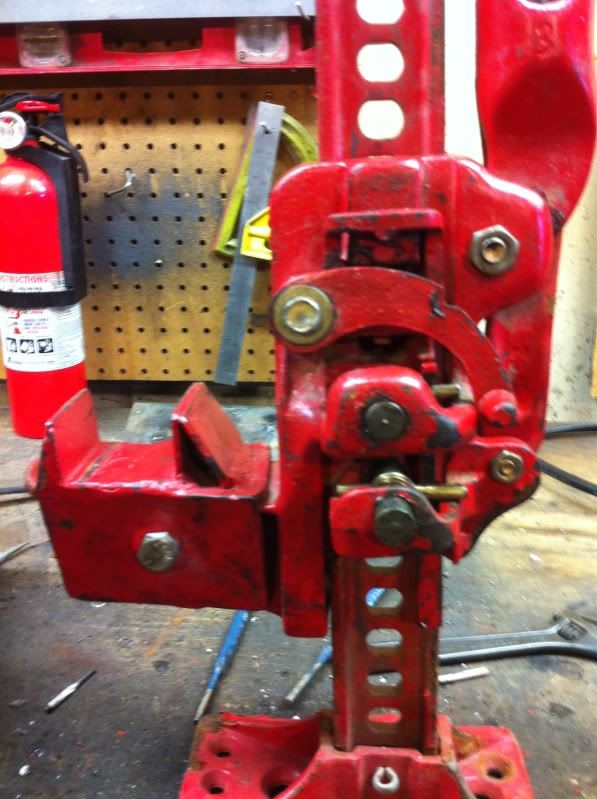
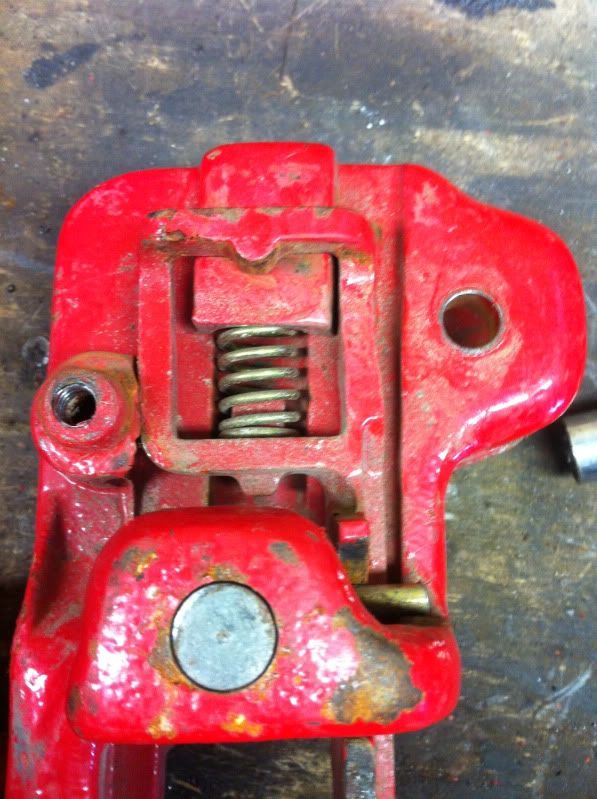
Tips: When reinstalling the cross pins into the climbing pins make sure you drive them in far enough that they will activate the reversing cam bar. It has a spring that slides up into the larger or upper runner. Note how you can see the cross pin peeking out on the right side where the reversing cam bar slides back and forth.
Inspect the climbing pins, if they appear to be worn, torn up, the need to be replaced. There are repair kits available with these parts in it, the kits are fairly affordable.
http://www.desertrat.com/products/?id=4094
Here is a link to an exploded parts list, so that you can see what the names of the parts are and where they go.
http://www.roversclub.org/docs/Hi-Li...n%20manual.pdf
Some videos about the High Lift Jack.
High Lift's video
http://www.youtube.com/watch?v=NIeASvjxDtU
4 Wheel Parts has a nice maintenance video, its about 2 minutes long.
http://www.youtube.com/watch?v=E2yYqYstCas
A video on how to use your High Lift Jack.
http://www.youtube.com/watch?v=MrfbR...eature=related
A 4 Wheel Parts video on a High Lift Jack can be used as a winch.
http://www.youtube.com/watch?v=I-8gFSOTxxA&NR=1
If you look at my jack, you will see a slider adapter on it. I made my own for square wall slider tubing. However, I got the idea from "WabFab", a Toyota fabricator that made the first commercially available slider adapter for a High Lift Jack.
http://www.wabfab.org/Slider-Adapter...ypage.tpl.html
IMO its kinda a cool, because it helps stabalize the jack on the slider, which is important when its necessary to lift the whole side of the vehicle up, and it makes it a little safer to do so. I still wouldn't get under a vehicle held up by a High Lift, but it does help make them a little more predictable.
Essentially, the pins and moving parts need lubrication a couple of times a year.
Mine hasn’t been apart in almost 10 years. In other words, I have never maintained it. :-/
This summer, I am out in California, on a trail with rocks the size of coffee tables, refrigerators and small cars when I get high centered. I grabbed my jack, jacked my Jeep up and then…………. then the jack got stuck.
So……… I am going to disassemble my jack and make sure that its properly maintained.
1. I took the clevis bolt out and took the clevis off the end.
This allows you too slide the "large runner" assembly out.
Step 2
Step 3 Take the bolts out of the pitman arm.
Requires a 1/2 and 13/16" sockets
Step 4 Pull the small runner out, which is the lower runner, and fits inside the larger runner.
Step 5 Knock the pin out of the upper or top climbing pin.
Pay attention on what direction the wedge is pointed before pulling it out of the upper runner.
Both climbing pins should have the wedge pointed towards the top of the High Lift Jack.
Step 6 Knock the pin out of the lower runner
Step 7 Lube it up
Step 8 Put it back togather.
Tips: When reinstalling the cross pins into the climbing pins make sure you drive them in far enough that they will activate the reversing cam bar. It has a spring that slides up into the larger or upper runner. Note how you can see the cross pin peeking out on the right side where the reversing cam bar slides back and forth.
Inspect the climbing pins, if they appear to be worn, torn up, the need to be replaced. There are repair kits available with these parts in it, the kits are fairly affordable.
http://www.desertrat.com/products/?id=4094
Here is a link to an exploded parts list, so that you can see what the names of the parts are and where they go.
http://www.roversclub.org/docs/Hi-Li...n%20manual.pdf
Some videos about the High Lift Jack.
High Lift's video
http://www.youtube.com/watch?v=NIeASvjxDtU
4 Wheel Parts has a nice maintenance video, its about 2 minutes long.
http://www.youtube.com/watch?v=E2yYqYstCas
A video on how to use your High Lift Jack.
http://www.youtube.com/watch?v=MrfbR...eature=related
A 4 Wheel Parts video on a High Lift Jack can be used as a winch.
http://www.youtube.com/watch?v=I-8gFSOTxxA&NR=1
If you look at my jack, you will see a slider adapter on it. I made my own for square wall slider tubing. However, I got the idea from "WabFab", a Toyota fabricator that made the first commercially available slider adapter for a High Lift Jack.
http://www.wabfab.org/Slider-Adapter...ypage.tpl.html
IMO its kinda a cool, because it helps stabalize the jack on the slider, which is important when its necessary to lift the whole side of the vehicle up, and it makes it a little safer to do so. I still wouldn't get under a vehicle held up by a High Lift, but it does help make them a little more predictable.
Comment